Migrating Data Between Zoho CRM Accounts
Retrieve Data files from Zoho CRM
If you are planning to use a backup of data from Zoho CRM to import, the file structure does not change. If you exported data from another CRM, use the following folder structure:
- The Data folder should contain all the data files, including the CSV file with the record of attachment mappings.
- The Attachments folder should contain the source files used as attachments in the CRM account.

Note
- Data and Attachments are in .ZIP format (compressed file). When you extract Data.zip, a new folder gets created with the appropriate files. Kindly refrain from compressing the extracted folder and uploading it during migration. Instead, upload the original folder (Data.zip).
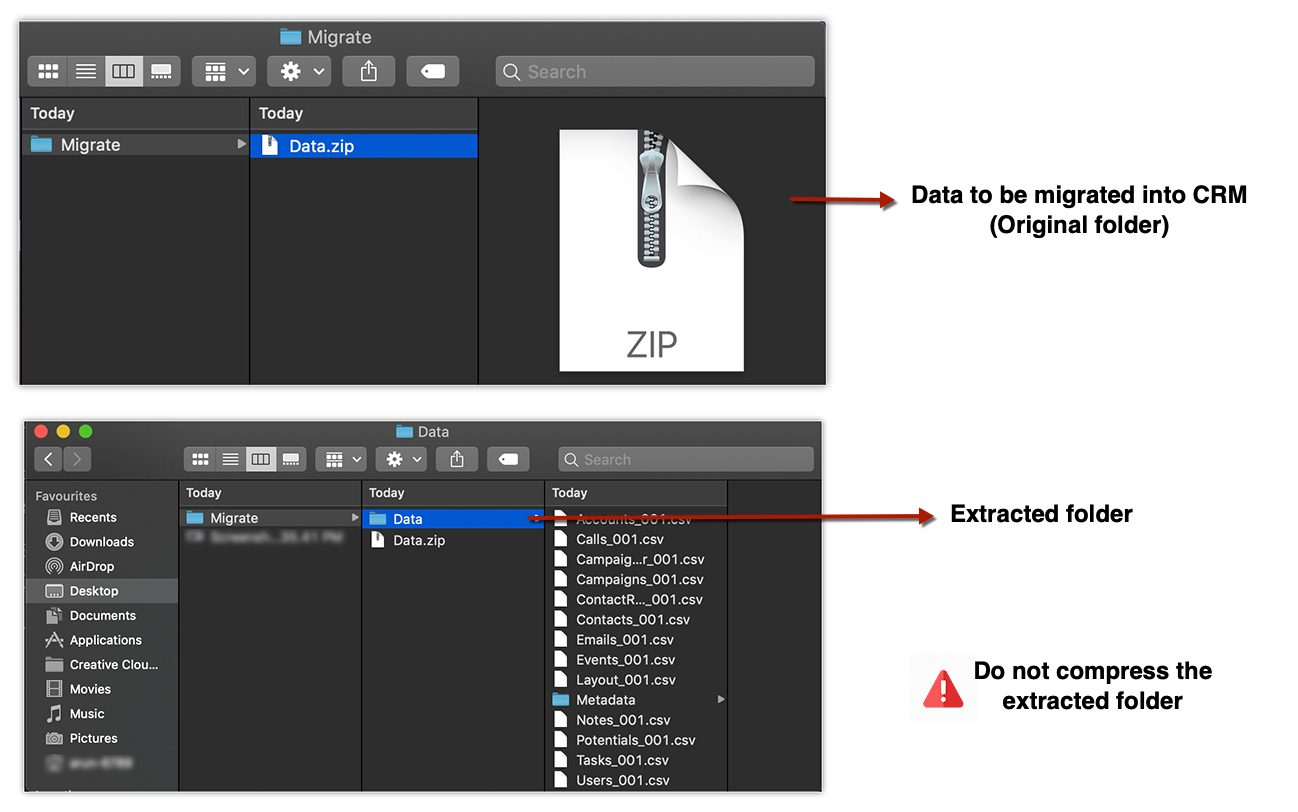
- All your data should be in this format. If there are any extra folders, the upload may fail.
Modules supported for import
You can migrate the following supported modules to Zoho CRM from another CRM account:
|
|
Migrate data between Zoho CRM accounts
To migrate data
- Log in to Zoho CRM with an account which has Administrator privileges.
- Go to Setup > Data Administration > Import.
- In the Data Migration page, choose Zoho CRM.
- In the pop-up, browse and upload the files.
You can select multiple files or upload a zip file to migrate data into more than one module. - Click Next.
Zoho CRM automatically reads you files and maps the data to the correct modules and fields. - You can do the following in the Module-File Mapping section:
- View the mapped and unmapped modules separately.
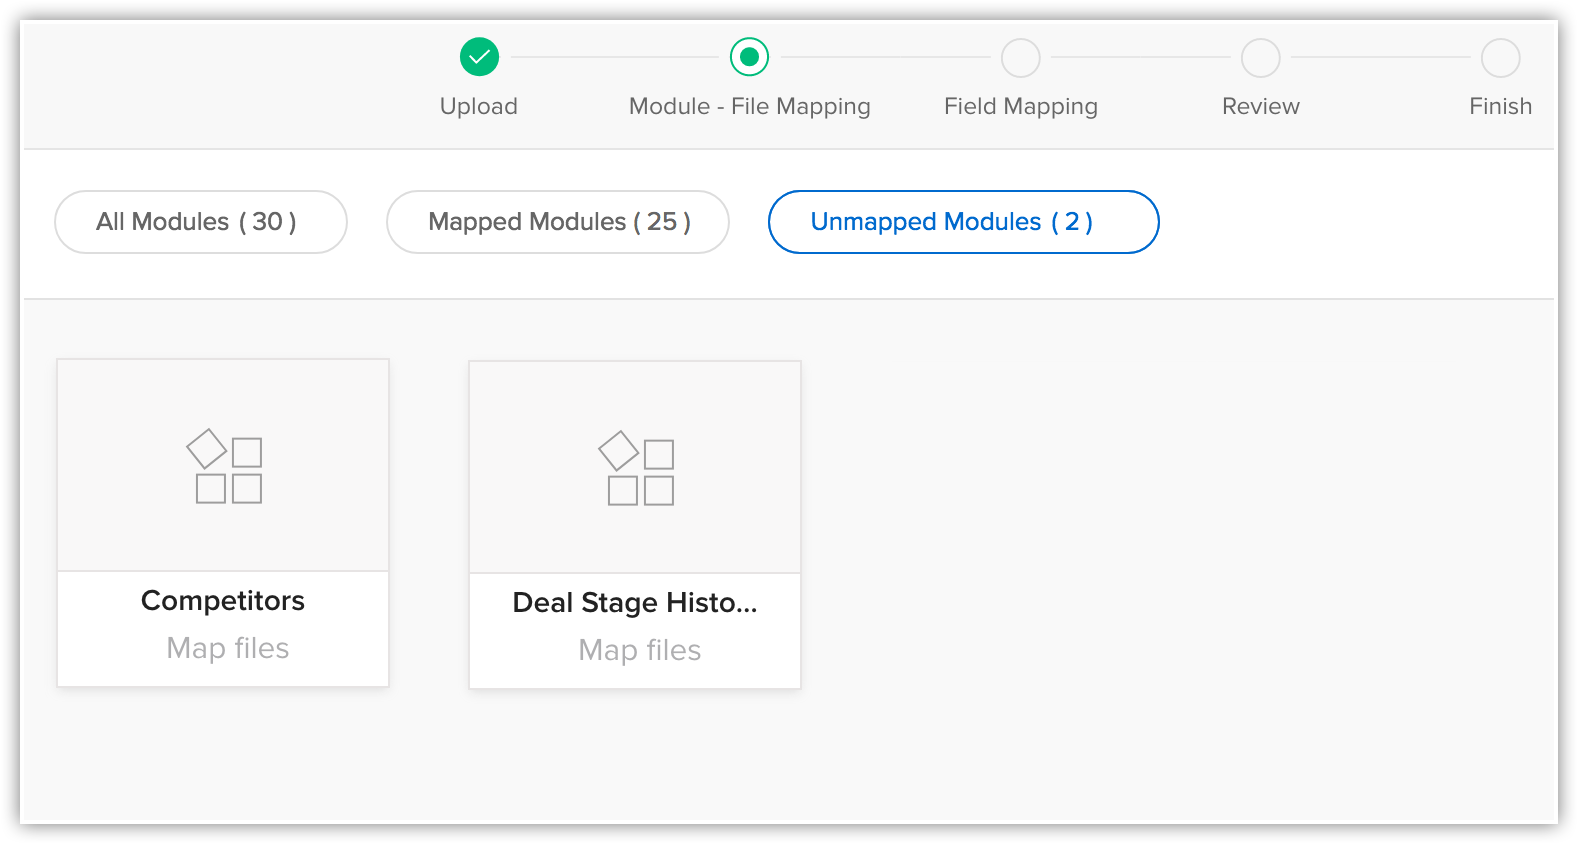
- Click on a file and see which module it is mapped to.
- View the mapped, unmapped and unsupported files separately.
- Click the Discard Migration link to start again.
If custom modules were automatically created during migration, they will not be deleted. Only the data added to these modules will be deleted.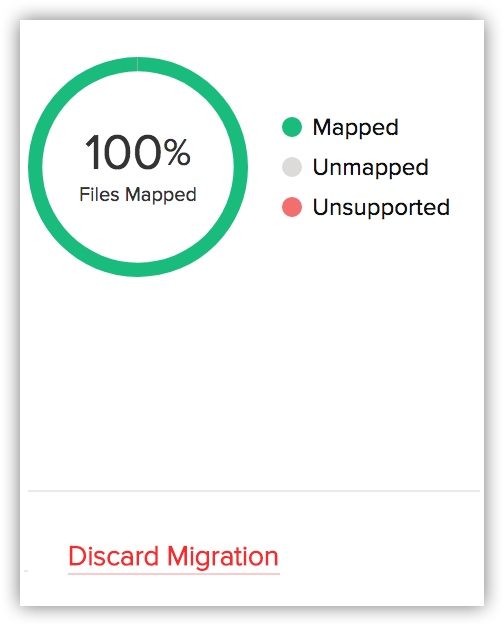
- View the mapped and unmapped modules separately.
- Click on a module to view the files that have been mapped to it.You can also select from the Unmapped files and associate them. Multiple files can be mapped.You can also create a new module and map the appropriate file.To create a new module, do the following:
- Click Create New Module.
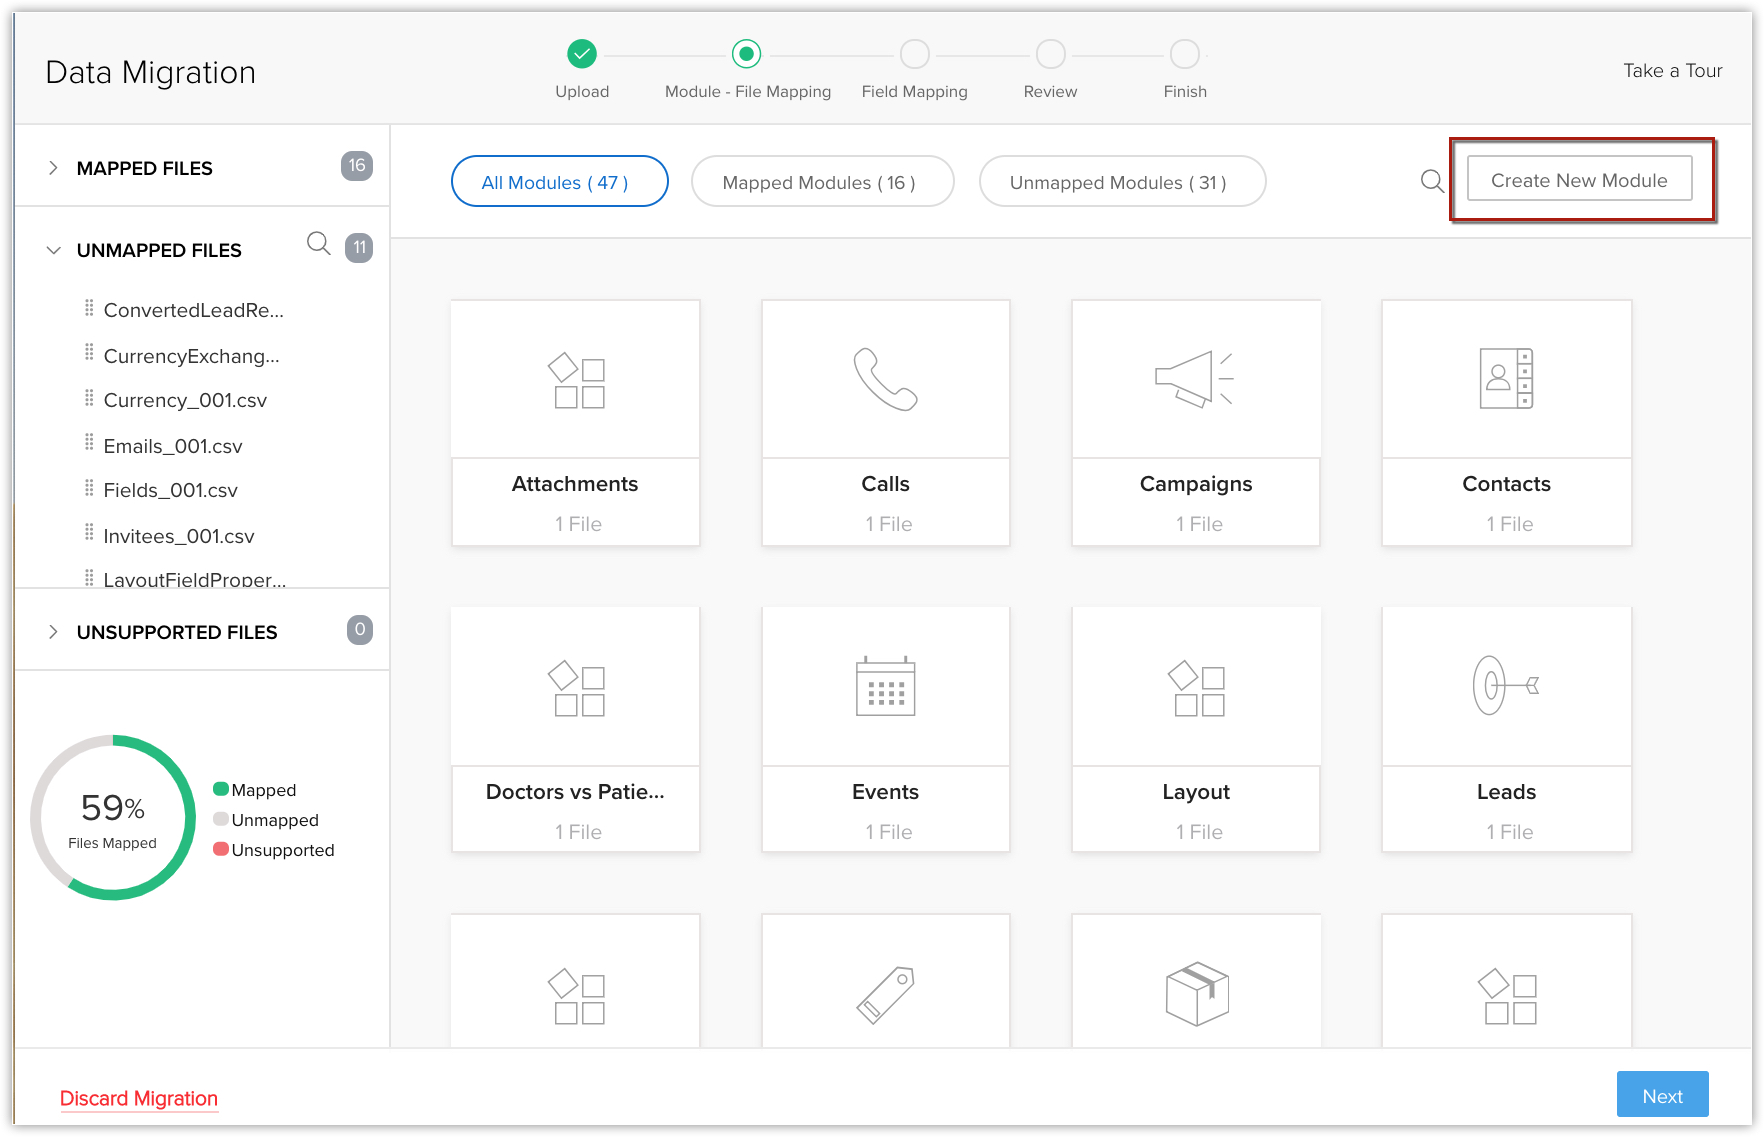
- Enter the module name and click Next.
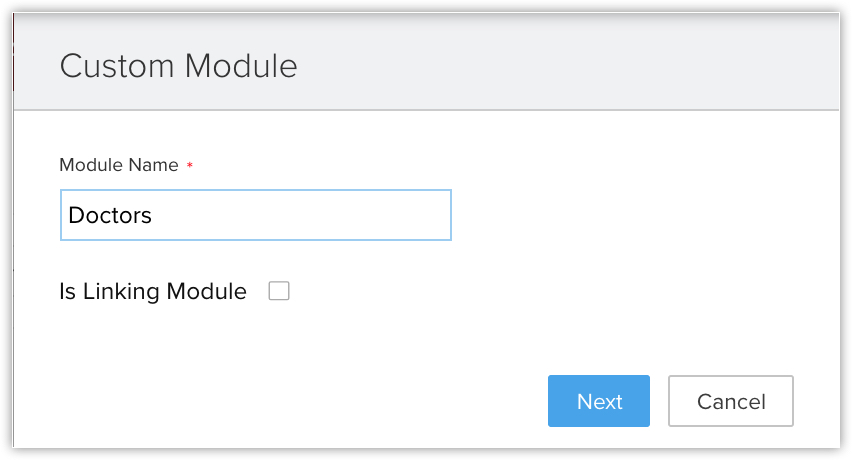
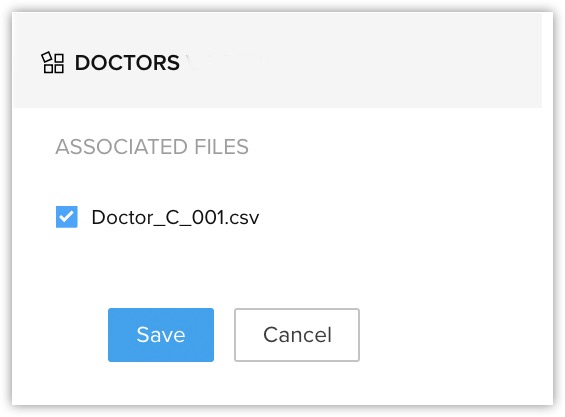
- Select the file to be mapped with this module and click Save.
- Click Create New Module.
- Click Next.
The mapped modules will be listed where you can map the fields for each module. - In the Map Fields section, make sure that you map all the mandatory fields for each module.
The field names that you specified in the CSV file will be available in the drop down lists. - Click Create Custom Fields if you want to add new fields and insert data into them during the migration.
You have the option to create a maximum of 50 fields during the migration. This limit is inclusive of the overall limit for custom fields in your Zoho CRM edition. (Skip to step 12 if you do not want to create fields) - In the Create Custom Fields pop-up, do the following:
- Modify the field labels, if required.
All the fields from the import file that were not mapped for migration because they are not available in Zoho CRM will be listed with their column numbers from the import file.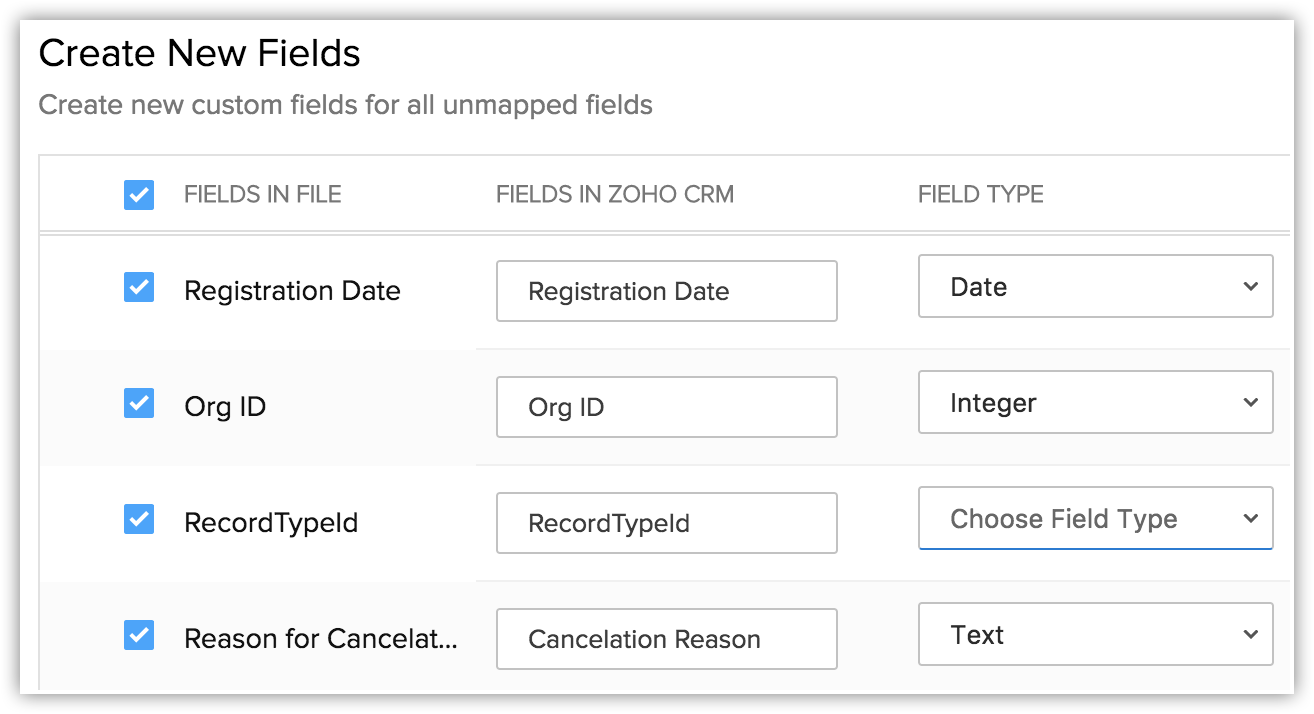
- Select the Field Type from the drop-down list.
Autonumber and Formula are not available. You cannot create these fields during migration. - Click Create.
The field will be created and mapped to the columns in the import file. - Click Close and continue the migration process.
- Modify the field labels, if required.
- Click Save and Next.
- In the Review page, check the Field Mapping Status and the Pre Migration Statusfor Each Module.
- Click StartMigration to initiate data migration.
You can still click Edit Mapping and Re-run Migration while the migration is running.

Note
- Tags can be migrated from your file into CRM.
- If a record has more than 10 tags, only the first ten tags will be migrated.
- Each tag can have a maximum of 25 characters.
- If a record has more than 10 tags, only the first ten tags will be migrated.
- The data migration process will be paused if more than 5,000 records in a module are skipped during migration. You will have the option to discard the migration or continue. Zoho CRM will also inform you for each module if more than 5,000 records are skipped.
- You can undo the data migration from Import History. See Also Import History

Guidelines for migrating Services and Appointments modules
Services
Before starting to migrate services, ensure you have both the "Services" and "Services X Users" files. These are essential for the process.
- Migrating job sheets within services
To include the Job Sheet during services migration: - Go to Setup > Modules and Fields > Services.
- Make sure the Job Sheet Preference under Preferences is active.
- Handling different currencies
If the currency in your file isn't the same as the CRM's home currency, the CRM will use its default currency. For instance, an amount like ₹5000 INR in your import file will be converted to $5000 USD in your CRM if the home currency is USD. - Business hours and service availability
If a service is available only for a portion of your designated business hours, its service hours will be adjusted accordingly. Conversely, if the service falls entirely outside your business hours, it will be designated as "Not in Use," and will trigger a warning notification.
For instance, consider a service with custom hours from 2 PM to 4 PM, with a duration of one hour. If the organization's business hours are from 9 AM to 3 PM, the service timing will be adjusted to 2 PM to 3 PM and updated in the account.
In a scenario where the service has a duration of two hours, the adjustment of service timing will render the duration incompatible; hence, the service status will be updated to "Not in Use".
Again, assume a service is available on Sunday, Monday, and Tuesday. If the business hours cover only Monday and Tuesday, Sunday will be excluded from the service availability, and the service will be updated accordingly. However, if the business hours are on Wednesday, the service will be marked as "Not in Use". Any transition of service status from "Available" or "Temporarily Unavailable" to "Not in Use" will generate a warning on the history page. - Dealing with unconfirmed users
Services that are associated with unconfirmed users will not be transferred during the migration process and will be skipped. It's important to make sure that all users in the CRM are confirmed before initiating the migration. Additionally, inactive and confirmed users can still be part of the services.
Appointments
- About appointment owners
Appointment owners do not need to be among the members providing the service, but they must be confirmed users in the CRM. - Addressing engagement constraints
The CRM system permits the migration of appointments for Appointment Owners even if they have other commitments. For example, if the appointment owner already has another appointment scheduled at the same time, the system will still add the new appointment. - Customizing the "Appointment For" field
For appointments linked to custom modules, ensure those modules are set up in the "Appointment For" field. If not, the CRM will skip those appointments during migration. - Service status and migration
Even if appointments have a status of "Not in Use" under services, they can still be migrated. - Managing business addresses in appointments
During migration, the CRM will use the business address from the import file for appointments. For scheduled appointments, the CRM will default to the organization's registered business address. - Migration of appointment duration
The duration of the appointment will be determined based on the appointment records. If the duration is found to be invalid or incorrect, the duration of the respective service will be used instead.
Migrate data from Zoho ContactManager
To migrate data from Zoho ContactManager
- Go to Setup > Data Administration > Import.
- In the Data Migration page, do the following:
- Choose Zoho ContactManager.
- Click Migrate Now.
You will be notified through a pop-up and email, when the migration is complete.
- Choose Zoho ContactManager.
Check for Data Accuracy
After importing each file, check that the data imported correctly. Kindly check if the files are imported correctly into the Zoho CRM account by visiting the Import History.
If the data is not imported properly or the fields were incorrectly mapped, you can delete the imported records and reimport.
Related Articles
Migrating from Sugar CRM to Zoho CRM
Welcome to Zoho CRM! Migrating your data from Sugar CRM to Zoho CRM can be done seamlessly using our data migration feature. All you need is to have an export file from Sugar, ready to use. Click here to learn to export data from their CRM. Before ...Importing Data to Zoho CRM
Data can be gathered through various sources such as, purchasing a record database, collecting from trade shows and campaigns, and so on. Importing records from such external sources to Zoho CRM is one of the most important lead creation activities ...Migrating from Bigin to Zoho CRM
You can migrate your data from Bigin to Zoho CRM by uploading a data backup of your Bigin account into your Zoho CRM account. This involves only a few steps, as mentioned below. Pre-requisites: To initiate the migration of your data from Bigin, you ...Migrating from Capsule to Zoho CRM
The migration process from Capsule to Zoho CRM relies on APIs and Instance URLs. To initiate the migration, simply input the API key. The entire migration occurs in the backend, and upon completion, you'll receive an email notification. You have the ...Migrating from Salesforce to Zoho CRM
Data files from Salesforce The zip file you upload should contain all the files in CSV format and a folder named Attachments. This folder contains the source files used as attachments in Salesforce records. One of the CSV files will list the record ...